Quick answer: A raingarden is a planted dip that soaks up roof and driveway runoff instead of sending it down the drain. Make it about a tenth of the roof area it drains and around 600 mm deep, with tough natives like oioi, Carex and wharariki, and a perforated pipe underneath on clay. Soil mix for a 10 m² bed costs around NZ$800 from landscape suppliers such as Central Landscapes, plus plants (checked October 2026).
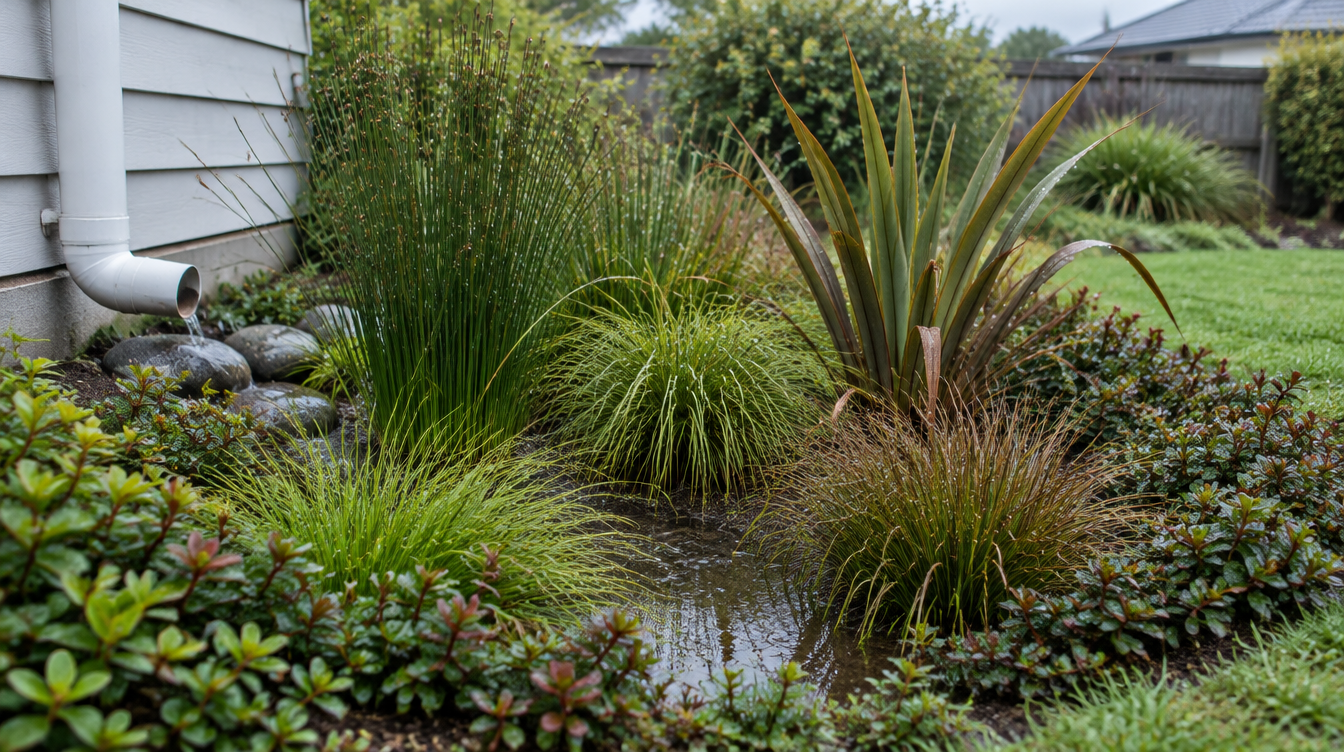
Every time it rains, the water that hits your roof, driveway and paths picks up whatever is sitting there: dust from brake pads, zinc from roofing, sediment, garden runoff. In most New Zealand towns it goes straight into a stormwater pipe and out to the nearest stream or harbour, untreated, and all at once. A raingarden slows that water down and gives it back to the soil first. It’s one of the most useful things you can build for your local waterway, and it looks like a garden rather than a piece of plumbing.
Why it matters for the planet, not just your section
Raingardens do three jobs at once.
- They clean the water. Auckland Council’s testing of raingarden soil mixes found sandy mixes cut dissolved copper by around 60% and zinc by around 70% over a simulated 15 years of use. Those metals come mostly from roofs, roads and cars, and they’re toxic to the insects and fish in our streams.
- They catch the everyday rain, which is most of the rain. Christchurch City Council’s guidance is that capturing the first 20 mm of a storm catches around 80% of the year’s runoff. Big storms make the news, but it’s the steady run of ordinary rain that carries most of the pollution.
- They put water back into the ground. Instead of leaving the section in a rush, water soaks in slowly, feeding the soil and groundwater and easing the surge that hits streams after rain.
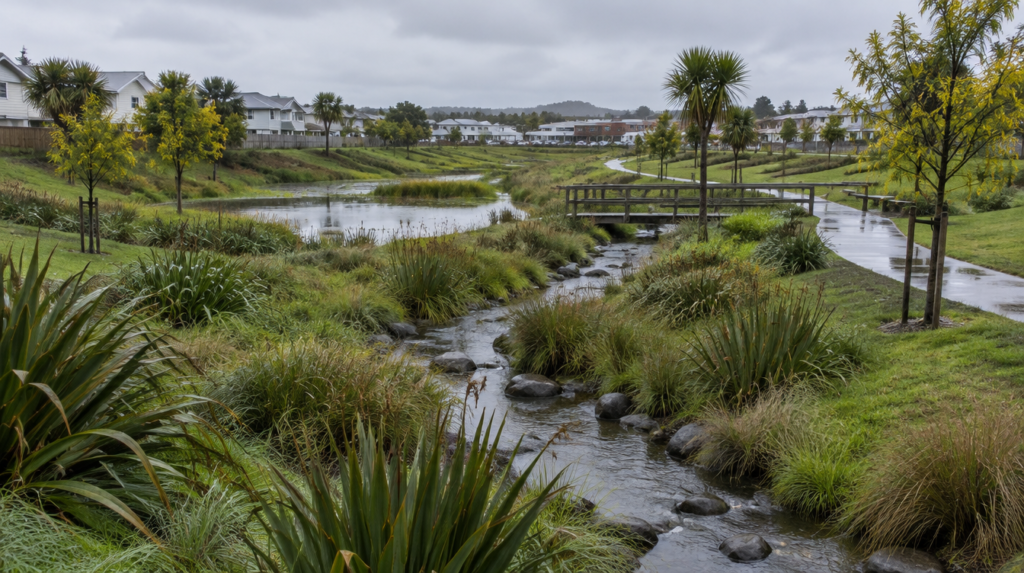
Councils already build them at scale. Auckland’s Healthy Waters looks after more than 4,700 raingardens and other public water-sensitive devices, and Napier’s Ahuriri Regional Park is turning 85 hectares of council farmland into a stormwater treatment wetland, built with Mana Ahuriri Trust and the regional council. A home raingarden is the same idea at the scale of one roof.
Water to land first: a Māori way of seeing it
There’s an old idea in te ao Māori (the Māori world view) that sits neatly behind all of this: water that has been used or dirtied should go to the land first, so the earth can cleanse it before it returns to the waterways. Ngāi Tahu’s Mahaanui iwi management plan supports exactly this kind of low-impact stormwater design.
A few words worth knowing, and what they mean:
- Papatūānuku is the earth mother in Māori tradition, the land from which all life comes (Te Ara: The Encyclopedia of New Zealand).
- Wai means water.
- Iwi means tribe; Ngāi Tahu is the principal iwi of much of the South Island.
- Ki uta ki tai means “from the mountains to the sea”, the idea that land, rivers and coast are one connected system and should be cared for as one.
- Kaitiakitanga means guardianship of the natural world. Te Ara describes people as part of the natural order, not above it.
You don’t need to borrow any of these words to build a raingarden.
What a raingarden is (and what it isn’t)
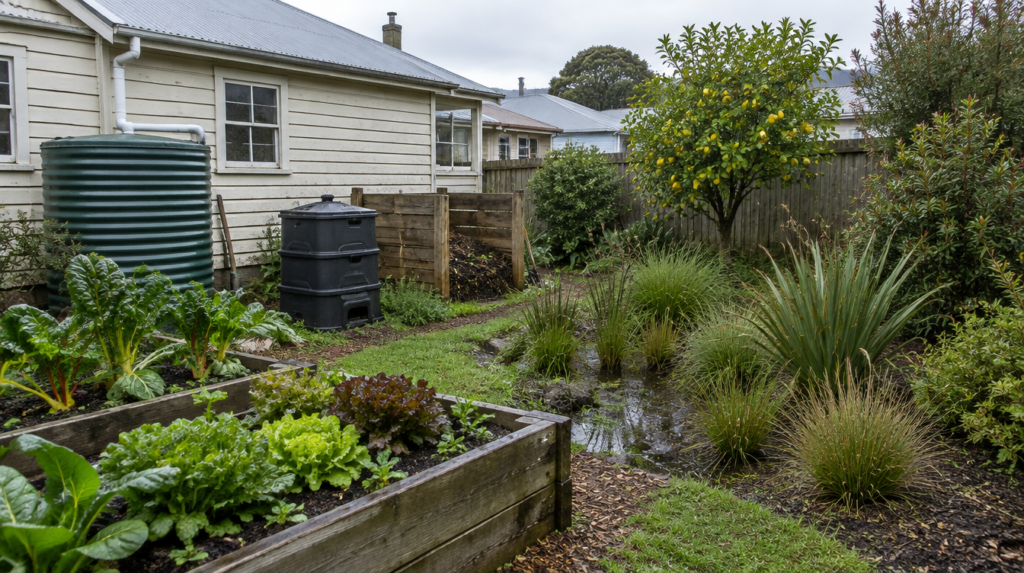
A raingarden is a planted hollow filled with a free-draining soil mix. Water runs in from a downpipe or a paved area, ponds briefly on the surface (no more than 200 to 300 mm deep), soaks down through the mix, and is gone within a day. On heavy soils, a perforated pipe at the bottom carries the cleaned water away to a safe outlet.
The biggest misunderstanding is that it’s a bog garden. It isn’t. Water should sit for hours, not days, so most of the time the plants are living in fast-draining, fairly dry soil. They need to cope with a soaking and then a dry spell, which is why tough natives do better than swamp plants.
A raingarden is also different from a swale, which is a planted channel that moves water along the surface while filtering it, and from a soak pit, which is an underground rock or crate pit that puts water into the ground without cleaning it.
Is your section suitable?
Do this simple test before you dig anything:
- Dig a hole about 300 mm deep where you’d like the raingarden.
- Fill it with water and let it drain. Then fill it again.
- Time how quickly the second fill drops.
Christchurch City Council’s manual treats a soil that drains at 50 mm an hour or more as good enough for a raingarden to drain straight into the ground. If yours drains much more slowly, which is common on New Zealand clay, you can still build one. It just needs a pipe underneath (more on that below).
Site it well:
- Keep it well away from your house foundations and your boundaries. Rules vary by council (Matamata-Piako, for example, sets 1.5 m for soakage), so check with yours.
- Put it downhill of the area it drains, so water flows in by gravity.
- Avoid spots where groundwater sits near the surface in winter. Christchurch’s guidance wants the seasonal high water table at least 800 mm down.
- Stay clear of underground services, septic fields and the roots of big trees.
- Plan where the overflow goes in a big storm. It must go somewhere safe: an existing stormwater connection, a lawn that slopes away from the house, never a neighbour’s property and never the wastewater (sewer) system.
How big should it be?
Council-engineered raingardens are sized at about 2 to 6% of the hard surface they drain. For a simpler home version, Sustainable Christchurch suggests about 10% of the area. So a 100 m² roof feeding one downpipe would suit a raingarden of around 10 m². Smaller still helps. A 3 m² raingarden on one downpipe catches far more than nothing.
How to build it, step by step
- Mark it out and dig. Aim for a flat base and gently sloped sides. Allow for about 600 mm of soil mix (Christchurch’s manual; Auckland’s specification uses 700 mm) plus a 200 to 300 mm dip on top for ponding.
- On clay, add an underdrain. Lay a perforated drainage pipe (around 100 mm) along the bottom with a slight fall, bedded in drainage gravel. Auckland’s construction guide uses around 400 mm of gravel around the pipe. Run the pipe to your safe outlet.
- Don’t mix your own clay with sand. This is the most common mistake. Auckland’s research found that adding sand to clay made it slump and drain worse, under 10 mm an hour. Buy a ready-made raingarden mix instead (see below). Christchurch’s approved home mix was 50% coarse sand, 10% topsoil and 40% compost. Auckland’s research favoured a sandier blend of 90% sand to 10% compost.
- Fill and settle. Add the mix in layers, lightly firm it, and leave the surface dipped so water can pond.
- Bring the water in. Run the downpipe into the raingarden through a pipe or a rocky channel, and put a few large stones where it enters so the water doesn’t scour the soil.
- Plant, then mulch lightly. No more than about 75 mm of mulch, kept back from the inlet so it doesn’t float away.
- Test it. Auckland’s guide gives a simple check: fill the dip to around 200 mm and it should drain within 24 hours.
A note on rules: planting a garden doesn’t need permission. Changing how your downpipes connect to the stormwater network, or building a soak pit, generally does need building consent and a licensed drainlayer, so talk to your council before you cut into existing pipes. The same applies to a plumbed greywater system; our guide to using greywater in the garden explains what needs a consent and what doesn’t.
The best native plants for a raingarden
The best evidence in New Zealand comes from Auckland Botanic Gardens, which has run raingardens and swales for more than a decade with no irrigation and no fertiliser. These are the plants that did well there, plus Christchurch City Council’s recommended list:
- Oioi (Apodasmia similis), a jointed rush that thrives in wet-then-dry conditions. It arches outwards as it grows, so plant it about 50 cm back from paths.
- Carex sedges: Carex dissita, Carex testacea and Carex flagellifera all performed well.
- Wharariki (Phormium cookianum), the smaller mountain flax. Its big cousin harakeke (Phormium tenax) grows too large near edges.
- Low-growing Coprosma, such as Coprosma acerosa and Coprosma × kirkii, for groundcover on the drier rim.
- Cyperus ustulatus (giant umbrella sedge) for the wetter centre of larger raingardens.
- Muehlenbeckia astonii, a tough, twiggy shrub that handles wet and dry.
- Juncus edgariae (a native rush), Astelia fragrans, Libertia grandiflora and Pimelea prostrata from the Christchurch list.
Two things to avoid. Deciduous trees drop leaves that smother plants and block the inlet. And Auckland Transport’s planting guide notes that Libertia struggles where a lot of sediment washes in, so keep it to raingardens fed by a clean roof rather than a driveway.
Plant densely so the roots open up the soil and the foliage shades out weeds. Oioi costs around NZ$9.50 for a 2.5 litre pot from Gough’s Nurseries (checked October 2026), and native nurseries such as The Plant Company and Southern Woods sell most of the list online.
Where to get the soil mix
Buy a purpose-made mix rather than blending your own.
- Central Landscapes RG240 (Auckland and Hamilton yards): around NZ$132 per cubic metre, plus delivery (checked October 2026).
- Living Earth Raingarden Mix (Auckland and Christchurch): BioGro certified organic and made to Auckland Council’s specification.
Outside those cities, ask your local landscape supplier for a bioretention or raingarden mix and check it is mostly sand with a little compost.
Looking after it
- No fertiliser and no weedkiller. Whatever you add washes straight through. Even compost-rich mixes leach some phosphorus, which is why Auckland’s research favours sandier blends.
- Weed it in the first two years until the plants close over.
- Clear the inlet of leaves and sediment after big storms, and check the overflow is clear.
- Every ten years or so, if water starts sitting for more than a day, Christchurch’s manual suggests replacing the top 100 mm of mix.
What it costs
A DIY raingarden is mostly the cost of soil mix and plants. A 10 m² bed at 600 mm deep needs about 6 cubic metres of mix, so around NZ$800 at RG240 prices, plus delivery. Add plants at around NZ$9.50 to $17 each, a few metres of drainage pipe and gravel if you’re on clay, and a weekend of digging.
Having one professionally designed and built costs much more. An Auckland Council study put a single-house raingarden of around 18 m² at roughly NZ$6,900 to $12,700 (2013 figures), with most of that in earthworks and labour. We couldn’t find any council grants or rebates for home raingarden building in Auckland, Wellington, Christchurch, Hamilton, Tauranga, Napier or Hastings, which is a gap compared with many Australian councils.
What a raingarden won’t do
Be realistic about what it can handle. A raingarden is built for the frequent, everyday storms that carry most of the pollution, not for a cyclone. When Auckland’s record rain fell on 27 January 2023, no home raingarden would have held it. Its overflow just needs to send the excess somewhere safe. Its real value is the many ordinary rain days each year when it quietly cleans and soaks away water that would otherwise go straight to a stream.
The Bottom Line
Our pick for most sections is a raingarden of around a tenth of the roof area it drains, filled with a bought raingarden mix and planted densely with oioi, Carex and wharariki. If you’re on clay, add a perforated pipe underneath rather than trying to fix the clay with sand. If space is tight, a small raingarden on a single downpipe is still well worth it. And if you want to go further, the same thinking scales up: our guides to no-dig gardening and starting a food forest both build soil that holds water better, and our guide to natural building materials covers the wider low-impact picture.
Sources and further reading
- Auckland Council: rain garden construction guide
- Christchurch City Council: rain garden design, construction and maintenance manual
- Auckland Council TR2013/011: media specification for stormwater bioretention devices
- Sibbaldia: Auckland Botanic Gardens’ sustainable water trail and plant performance
- Auckland Transport: bioretention planting guide
- Mahaanui Iwi Management Plan
- Te Ara: Papatūānuku, the land and Te Ara: kaitiakitanga
- Ahuriri Regional Park masterplan
- Auckland Council: Making Space for Water, year in review 2024/25
- Auckland Council TR2013/043: stormwater management provisions, cost and benefit assessment
- Sustainable Christchurch: notes from a water sensitivity walk (rain gardens)
- Matamata-Piako District Council: soakage manual
Affiliate disclosure: Some links on ThrivingKiwi may earn us a small commission if you buy through them, at no extra cost to you. Paid links are marked as sponsored. We only recommend products we genuinely believe are worthwhile.