There’s a moment every gardener eventually has: you’re holding a packet of seeds that cost $5.50, looking at a bolted lettuce covered in hundreds of free ones, and the penny drops. Seed saving is a longstanding horticultural skill that can reduce costs and help maintain useful varieties, and New Zealand happens to have one of the richer heritage seed traditions to plug into.
Here’s the honest beginner’s guide: what’s easy, what’s genuinely tricky, and how to do it properly so next spring’s garden costs you almost nothing.
The one rule that makes everything work
Save seed from open-pollinated varieties, not hybrids. Seed packets (and plant labels) marked F1 are hybrids — their seeds are viable but won’t grow “true to type,” so next year’s plants are a lottery. Open-pollinated and heirloom varieties breed true: save their seed and you get the same plant back, gradually better adapted to your specific garden with every generation. That local adaptation is seed saving’s quiet superpower — after a few seasons, your saved tomato line is measurably more at home in your conditions than anything in a packet.
Start with the easy five
These crops are self-pollinating or forgiving, making them near-foolproof first projects:
- Tomatoes — scoop seeds and gel into a jar of water, let it ferment 2–3 days (this dissolves the germination-inhibiting gel and looks disgusting, which is how you know it’s working), rinse, dry on a plate for a week or two. Done.
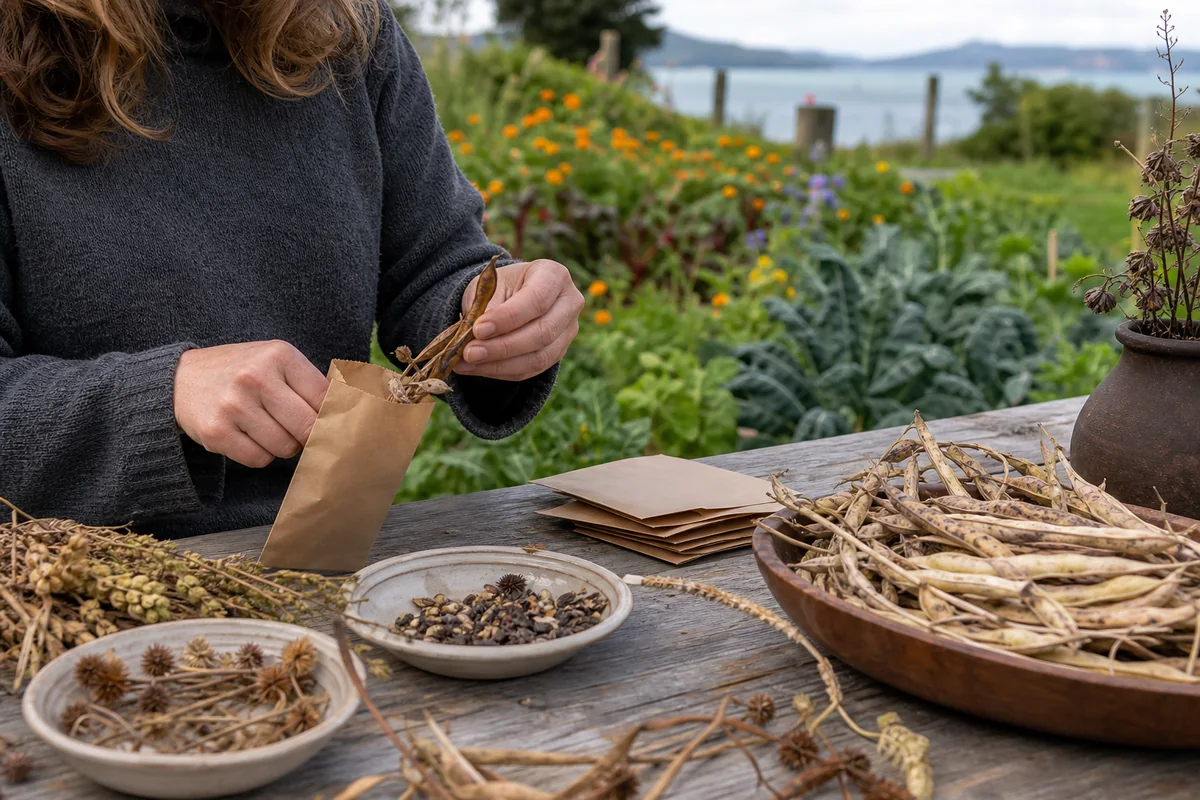
- Beans and peas — the easiest of all. Leave pods on the plant until brown and rattly, shell, dry another week indoors, store.
- Lettuce — let one plant bolt and flower; the seed heads work like tiny dandelions. Shake into a paper bag.
- Coriander and other herbs — let them do what they desperately want to do anyway (bolt), and harvest the seed heads when brown.
- Pumpkins — with an important asterisk — dead easy to save (scoop, wash, dry), but pumpkins cross-pollinate enthusiastically, so unless yours grew isolated from other varieties, expect surprises. Kiwi gardeners’ compost-heap mystery pumpkins are a national tradition for exactly this reason. Read the safety note below before eating anything grown from saved cucurbit seed — the surprises are not only about shape and flavour.
Leave these until you’re hooked
Brassicas (they cross with each other and even wild relatives, and are biennial — they seed in year two), carrots and parsnips (also biennial and promiscuous crossers), corn (needs large populations and isolation), and cucurbits generally (the pumpkin problem, squared). None are impossible — they just need isolation distances or hand-pollination, which is second-season knowledge.
Two safety notes to read before you start
Bitter squash: taste before you eat. Cucurbits — pumpkin, squash, courgette, cucumber — produce compounds called cucurbitacins. Cultivated varieties contain very little, but saved or volunteer seed that has crossed with a wild or ornamental relative can produce fruit carrying dangerously high levels. Eating it causes what’s known as toxic squash syndrome: nausea, vomiting, diarrhoea and abdominal pain, sometimes lasting a couple of days. Cooking does not destroy the toxin, so taste is your only warning. The rule is simple and absolute — take a very small taste of the raw flesh, and if it is bitter, spit it out and throw the whole fruit away. This is precisely why the compost-heap mystery pumpkin deserves a taste test rather than a roasting tin.
Carrots, parsnips and their relatives: know exactly what you’re handling. Two cautions here beyond the cross-pollination problem. First, carrot and parsnip left to flower look a great deal like several toxic relatives in the same family, hemlock among them — never save seed from a volunteer umbellifer you cannot positively identify as the crop you actually planted. Second, parsnip (Pastinaca sativa) sap causes phytophotodermatitis: get it on your skin, expose that skin to sunlight, and a rash follows 24–48 hours later, ranging from mild reddening to severe blistering that can leave brown scars lasting months. If you’re cutting down a flowering parsnip for seed, wear long sleeves, long trousers and gloves, and do it late in the day.
Drying and storing: where most beginners lose their seeds
- Dry thoroughly — seeds that feel dry are usually still too moist inside. Give everything an extra 1–2 weeks somewhere airy, out of direct sun. A seed that snaps rather than bends is dry.
- Cool, dark, dry storage — paper envelopes inside an airtight container in a cool cupboard beats the shed (temperature swings) and beats plastic bags (trapped moisture = mould). Some gardeners add a silica sachet; in humid northern NZ that’s genuinely worth doing.
- Label ruthlessly — variety, year, where it grew. Every seed saver has a jar of mystery seeds they were sure they’d remember. They never do.
- Use within sensible windows — most vegetable seed keeps 2–5 years stored well (tomatoes and beans are long keepers; parsnip and onion seed fades fast — use fresh).
The NZ heritage seed story (and why it matters)
Seed saving isn’t just thrift — it’s how food diversity survives. New Zealand has a genuine treasure here: the Kōanga Institute guards the country’s largest heritage seed collection, including vegetable and fruit lines carried through generations of Māori and settler gardens that exist nowhere else on earth. Buying and growing their seed — or heritage lines from Setha’s Seeds — makes your backyard part of a living seed bank. For everyday open-pollinated varieties, long-standing NZ suppliers like Kings Seeds and Egmont Seeds label their ranges clearly, so avoiding F1s (when you want to) is easy.
A lovely low-commitment entry: many towns now run seed libraries and community seed swaps (often through public libraries or community gardens) — take a packet, grow it, return saved seed. Free seeds, local adaptation, and you’ll meet the exact people who can answer your questions.
A Kiwi seed-saving calendar
- Winter: inventory and order heritage lines for spring; store-check last season’s seed; let a few brassicas stand if attempting year-two seed.
- Spring: sow, and mark your best plants early — save seed from the healthiest, tastiest performer, not the leftovers.
- Summer: let chosen plants bolt/mature past eating stage; ferment tomato seed as fruit peaks.
- Autumn: the main harvest — beans rattling, seed heads browning, drying racks full. Label everything.
The bottom line
Start this coming season with tomatoes, beans and lettuce from open-pollinated varieties, dry everything longer than feels necessary, and label like your future self is a stranger. Within two seasons you’ll have a seed box that costs nothing, may become better adapted to your garden over successive, carefully selected generations, and connects your backyard to a heritage worth keeping alive. It pairs perfectly with our guides to winter growing and eating in season — grow it, save it, eat it, repeat. The beds those seeds go into are worth a thought too — our guide to no-dig gardening in NZ explains that method. If you want the wider design thinking behind it, our guide to permaculture courses in NZ covers where to learn it.
Biosecurity note: Seeds imported into New Zealand must meet MPI import-health requirements. Check the current Plants Biosecurity Index and import steps before ordering seed from an overseas seller.
Sources and further reading
- University of Minnesota Extension: Saving vegetable seeds
- MPI: Importing seeds for sowing
- Poison Control: Toxic squash syndrome — if it’s bitter, it’s not dinner
- Oregon State University Extension: Are volunteer squash toxic?
- University of Wisconsin Horticulture: Wild parsnip (Pastinaca sativa) and phytophotodermatitis